
Using e-smith Internet Gateway on the NTL Cable Modem Service
Despite the fact that e-smith runs a light version of RedHat, it still provides numerous services to your LAN as well as providing gateway services to the Internet. At it's very basic, e-smith is a Linux Router offering NAT and firewalling (as of Version 4.1) services but with it's ability to also operate as the Proxy, Mail, DNS and FTP servers for your LAN connected machines it can also provide both Intranet/Internet Web servers, both with CGI, PHP and SSL support. In addition Virtual Domains and Information Bays can also be set-up, resulting in an extremely flexible and powerful Internet system.
Perhaps the most outstanding feature of e-smith is it's administration utilities. The majority of the configuration for the system is performed from a web browser running on the internal network nearly all administration tasks can be done from it, with the important configuration available from a text-based configuration tool. You therefore do not need an extensive knowledge of Linux in order to use it, although some knowledge can be useful.
Obtaining and Installing E-Smith
The e-smith distribution is available for free download from the e-smith website and it is only available as an iso image, so you will need to be able to extract this image to a CD. Once you have your extracted e-smith CD, you can either boot your intended machine direct from the CDRom, or you can create a boot disk on floppy by using the included rawrite utility in the dosutils directory. Further details on the installation of e-smith are also on the e-smith downloads page.
It is important to note two things when considering e-smith. The first is that installing e-smith will wipe the hard disk of the target machine, so make sure there is not data on the disk that you want, and the second is that e-smith has partial support for some hardware, so check the compatibility list to make sure you can use it.
Installation Considerations For NTL Cable Modem Service
During the installation process for e-smith you will be asked a couple of questions regarding your IP address settings, your hostname and your domain.
As regards the IP address allocation, you should enable your external facing interface to use the DHCP client with the (send ethernet address as client id) option selected. I find this option works 100% of the time. It is entirely optional to enable DHCP for the internal LAN, I choose not to, but you may prefer to do so. If you do, remember to set your LAN PCs to contact a DHCP server for their address, which they will get from your e-smith server.
As far as your hostname and domain settings are concerned, I would recommend setting the hostname as your NTL account name and the domain to ntlworld.com. My own set-up reflects the fact that I have my own domain registered and if you also have your own domain, then I would set your e-smith domain to be that instead as one consequence of specifying ntlworld.com as your domain is that www.ntlworld.com will resolve to your e-smith server. To some this may be an improvement, but to others it could be a major issue. If this is an issue you can bypass the e-smith proxy for this host within the setup of your browser.
During the configuration after installation, e-smith will also ask if you are using an Dynamic DNS facility, and I can thoroughly recommend the services available from Dyndns. In practice this enables me to advertise my public facing web service as http://nigs.homeip.net, rather than my currently assigned hostname from NTL. The e-smith setup for Dyndns requires your Dyndns username and password so that your dynamic hostname is updated automatically by the e-smith server in the event that your NTL assigned IP address changes for some reason.
Something else to consider is your Cable Modem's association with the MAC address of the Network Adapter connected to it. If you go thru' the process of installing an e-smith machine from scratch to replace an existing system attached to the Cable Modem, i.e., different PC and different Network cards, then you may need to reset your Modem so that the existing NIC's MAC address is deleted and the modem can re-learn your new MAC address. A method of avoiding the re-setting of the modem involves editing one of the e-smith template files so your NIC has the same MAC address of the original NIC connected to the modem.
On the subject of NICs, it is important to know that e-smith only supports PCI network adapters, and you will need two of them.
Editing NIC config to avoid CM re-boot
e-smith uses templates in order to build the necessary system files and these templates take the configuration set in the manager systems and applies them to the correct file. On a conventional RedHat system, the network configuration files are held in the /etc/sysconfig/network-scripts directory. e-smith also has it's network files in this directory but they are derived from the data contained in the template files located in /etc/e-smith/templates/etc/sysconfig/network-scripts. For each NIC, there is an ifcfg-ethX directory within here that e-smith uses to create the ifcfg files contained in the normal directories. Two files exist in these directories, template-begin and template-end. In order to 'spoof' the MAC address of the NIC that the Cable Modem thinks you have you need to add the line:
MACADDR=00DEADBEEF00
(where 00DEADBEEF00 = the 12 digit MAC address of your original NIC - see 'Finding Your IP Address', elsewhere)
to the template-begin file in the relevant directory, so e-smith uses this to set the hardware address of the original NIC.
Of course, you can avoid doing this by pin-resetting your modem.
Setting up e-smith initial configuration
After you have booted the system for installation, e-smith will guide you through the necessary steps to transfer the files from CD to the hard disk. Once complete, the system will reboot and automatically display the configuration screens. The default main menu of the console administrator is shown below, however, the first time e-smith is run, it bypasses this screen and allows you to set your configuration.
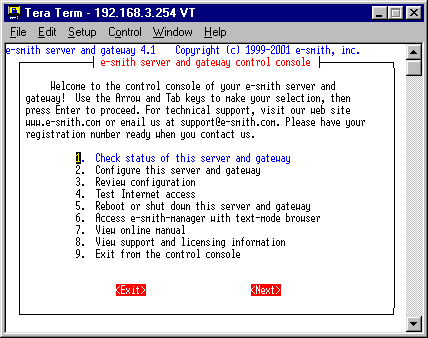 |
The e-smith admin console. Use the arrow keys to select an option, this press return As can be seen, most of the options are self explanatory |
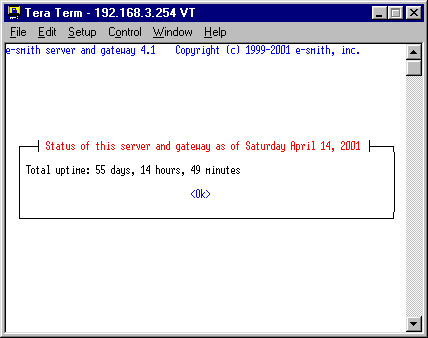 |
The display available when 1 is selected in the main menu |
Basic e-smith configuration, such as Network settings, domain name, etc., can be done by selecting option 2 from the main menu. It is possible to check your config, without the danger of inadvertantly changing the config, by selecting item 3.
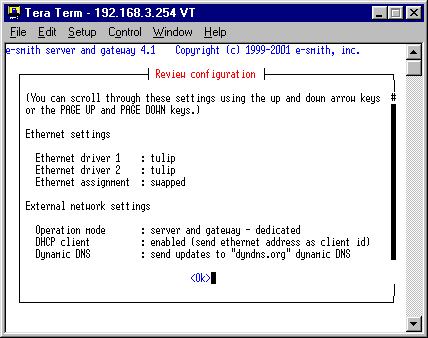 |
The Review Config screen covers a couple of screens worth of information so it necessary to page up and down thru' it to see all the settings. At the top is shown the ethernet adapter assignment for the system. It just so happens that both my adapters are the same type, but you may use different ones without problems (assuming they are supported by e-smith. Notice also that my assignment shows as being 'swapped'. By default, e-smith assumes eth1 is connected to the Internet but gives the option to change this to eth0 as this is my CM facing interface. The external network are settings are shown below. Here, I have specified my system as beiing a dedicated gateway and server, which gives the most flexibilty, and also told e-smith to use the DHCP client to get the IP address. Just below this are the details of the Dyndns service used. The username and password for this service are also shown here, but I have chosen to not let you see that! |
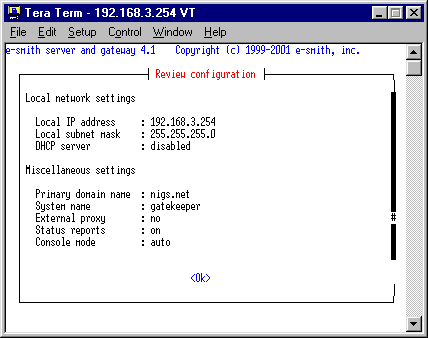 |
Paging down to see the rest of the configuration reveals the internal Network settings. Note that I have the internal DHCP facility turned off, but you
may prefer to enable it. Below this are the details for your domain and hostname. I use my own domain and have the hostname of e-smith set to gatekeeper. I do not use an external proxy as NTL's transparent proxy will trap traffic heading for Port 80 anyway. To avoid the NTL cache specify an external, public, proxy to use and ensure it runs on any other port rather than 80. I also choose to send status reports to e-smith, hence reports is set to on. Console mode refers to the behaviour of e-smith when you logon as admin. In auto mode the main menu is displayed automatically. This is as much configuration that is possible from the admin console. For further configuration, you need to use the e-smith manager from a web browser. |
Once configured, reboot your system and, all being well, it will connect to NTL's network, via the modem.
A word about passwords
By default the administrator account has no password, and you will need to specify one. The username is admin and you need to set the password up to be fiendishly difficult for someone else to guess, as this password also allows root access to the system. I recommend you create a password containing a combination of upper and lower case letters and numbers. For example, take the words drum and bass, then join them together and change some characters to uppercase or numbers or add some punctuation, thus 'drum and bass' becomes Drum&B4ss. Your e-smith system will only recognise the first 8 characters of the password, so the password will end up being truncated to Drum&B4s. Note, this is only an example, I do not recommend you actually use this password!
An alternative method of generating a password is to select a suitably long song title and take the first letter of each word in the title. For example, 'The Far Out Son of a Lung', by the Future Sound of London, results in the letters tfosoal, which we can change to be something like TF0$oa1. Again, I do not recommend you use this example for your own password, but hopefully, you get the idea.
Configuration using e-smith manager
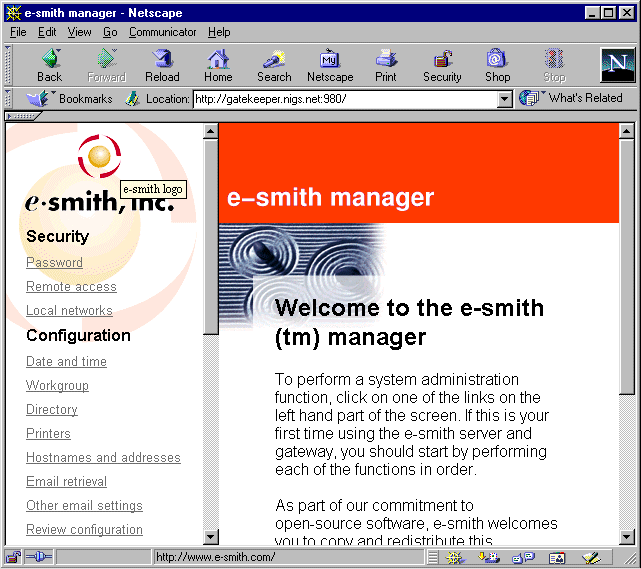
To access the e-smith manager, open a web browser on one of your LAN machines and enter the URL of your server, e.g., http://gatekeeper.nigs.net:980/. You will be prompted for the admin username and password, and entering them correctly will produce the index page for the manager interface:
Configuration of e-smith via the Web Manager Interface
All Copyrights and Trademarks ACK'd. Not to do so would be a SYN!